The colours I chose to use were both Barry M Nail Paints, in Raspberry 273 and Navy 292 (both only £2.99).
Firstly I put my basecoat on, I used Barry M's again (my favourite nail polish makers!!!). Then I put a white coat on, I don't use white nail polish a lot so I just used Nailene's White French Tip Pen (usually about £5.25, I got it in the clearance for about £2.50).
Next, you need to prepare your workstation. You need a cup or container you don't mind getting dirty, filled with lukewarm water. You'll also need something sharp to cut through the nail paints on the water. I would definitely recommend covering your fingers up and around the nail with tape, masking or sello, just so its easier to get off!
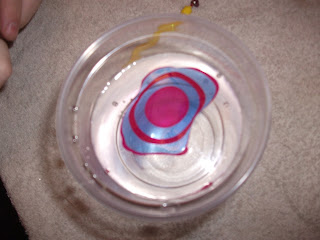
You then slowly put a drop into the water with your first nail polish, then put the next colour in the middle of that and so on, until you have reached the amount of rings you would like.. Like this....
You then use your sharp stick, such as a toothpick or even the end of a birthday candle, and start to make patterns in this! Unfortunately was too busy with my hands taped up to be able to take a picture of the next step, sorry!! Then, you choose an area of the pattern you like, and pop your nail on top of it. Then collect the spare nail polish up using a cotton bud or tooth pick. This is what it looks like when it's first taken out of the water..
Then wait until the polish is completely dry and remove the tape. Clean up the off smudges and mess with a cotton bud, and voila! Beautiful water marbled nails :)
If a video tutorial may be better, this is a one that I would definitely recommend!!
Her blog is at..


Very Pretty, I love the colours together
ReplyDeletewill defo be giving it a go
Kiwi..x
That looks amazing!! Thanks for the tutorial :)
ReplyDeleteWauw! really great nail art!
ReplyDeletewww.fashion-mind.com
This looks so good! It will look great with bright colours for summer too :D x
ReplyDeleteWow, this looks amazing. Me and my friend has a go at this and I totally failed but I might try again using your guide :) x
ReplyDelete